Tuesday, September 30, 2014

*Post Report* GenCon 2014

It has been a long time since I blogged.  A lot has happened in life and with R2.  School started again in August and totally took all of my time, but I did take R2-M5 into the classroom for display.  The kids thought it was totally rad.  I was excited to finally show it off to my friends at school and the kids and show everyone what I was up to during the summer.
R2-M5 in the classroom
        I was disappointed that I could not get my foot drive and drive system working well enough for the weekend of GenCon which was the weekend after school started.  I Tried the drive system the day before school started and there were problems with the center foot, which was pretty janky (I made it from scrap wood I had in my garage and it was not tight enough).
        I did go to GenCon with some friends without R2.  We had a great time walking around looking at the costumes and the games and the food trucks.  My buddy and I both had costumes and dressed up for a couple of hours.  It was a lot of fun to be in that world of people stopping you to take pictures and bringing joy to people just by making some sounds and reenacting scenes from their favorite movie.  I can't wait for R2 to become a part of that.
My Tusken Raider cosplay
Tacker and a Sandperson
          I took three weeks off of working on R2-M5 to concentrate on school and getting off the ground there.  But at the end of August we had a build day at my house.  There were three of us working in my garage.  It was a fun day that we will do again in October. We built wood legs for Gary, we put together and testing the drives for Jerry, and we got my new electronics working.
Nice legs, Gary!
But, Jerry's got a killer body!
High Polish.  I have to try this.

Friday, August 1, 2014

All Things Dome

       For the past couple of weeks I have been working on mostly dome stuff, but first I want to show off a couple of body pictures to go with the last post about the legs.  The legs have been put on and taken off a few times already because there are vents and other body parts that are easier to get on without them attached.  I also have pictures of the coin slots that have been completed and the 3D printed vents with the filler primer on them.  Looks pretty good and the chrome looks pretty good on the vents.  Some of the 3D printing still showed through, there did not seem to be a real way of getting rid of all of the ridges.
Legs are on

Coin Slots on either side of the center port

3D printed vents with filler primer on them
          Now on to all things dome.  I started reworking the dome by polishing it one more time before cutting out the inner panels.  I thought it would be wise because the inner dome really gives stability while pressing down so hard.  Went from 600 grit, to 1200 to 2000 and then some Brasso to polish.  It was a wet job as all of the sandpaper I used was wet sandpaper.  I did every round twice making sure to hit the small dome pieces between the panels just as hard.  The dome came out looking really nice, not a mirror finish but I may try another polish later, Brasso may not be the best one for aluminum, but it still looks great.  I need to find a way to be able to clean off fingerprints though, I have already put two on it.  
Sanding the dome
Shiny Dome
         After completing the polishing the real dome work started.  I started thinking and researching what to do next with the panels before I glued on the colored panels.  Almost every blog or post that I read online showed people cutting out all of the panels from both domes before hinges and gluing.  A few days earlier I had attempted to put two of my panels back on the body of R2 with their new hinges.  I had already glued the panels together and the skins as well, so I was unable to drill holes and bolts the hinge in place.  Glue was the only other option.  I had a load of trouble (twice) trying to line up and stick the panel door into place snuggly.  In fact, that door is still not on the body.
          With that trouble from the panels, I stared into the dome and thought about what to do next.  It seemed silly to me to cut out all of the panels in the inner dome and then measure and glue on hinges and then go ahead and drill holes to bolt everything back together.  It seemed like a lot of extra work.  I thought, "Why can't I just glue the hinges onto the inside of the dome, drill my holes, and bolt them on before cutting them out?"  A couple of guys online said that the panels may not open properly with the outer panel attached when I posted the question online, but I thought I would attempt one sample panel first and see what happened.  It would save a lot of headache later if it worked.
Sample panel cut out with hinge glued, not bolted
          I glued all of the hinges on with the dome part pushed as close to the laser cut hole as possible.  I figured that the panel, when cut out, already had a an eighth of an inch laser cut for me, it should clear with no problems.  I carefully used my Dremel cutting disc to make about 5-8 passes to cut one section off at a time.  After cutting both lines off, the panel dropped into the dome still on the hinge.  It seemed to have worked, but I still had to test the red outer panel with the outer dome on.  Everything seemed to have worked just fine.  The panel freely went through the dome and the outer panel sat nicely in the outer dome.  Test success!  Then I went through and drilled all of my holes from the inside out, that way I could use the hinges as guides.  And it was a lot of holes too, 32 to be precise.
Holes drilled and panels numbered, just in case
           After drilling the holes, I countersunk the outer holes (which needed to be drilled through again after countersinking).  Another mistake had been made in ordering and I didn't find it until I tried to bolt on the hinges.  I had ordered the incorrect nuts for the tiny captive studs, they were lock nuts and I could not tighten them the way I was supposed to.  Luckily, I found lots of the same sized nuts with other screws I wasn't using yet and was able to keep going.  I hate stopping when I'm on a roll.
           I bolted on the panels with a set of needle nosed pliers and set off to cut the panels off.  I discovered that the cutting discs would slip when going from the left to the right and after a couple passes I could plunge in at the right side and very slowly work my way to the left.  I got through all eight panels with 5 discs (I only had 6 :)
           As I cut each second line on the panels I got a satisfying thunk as the panel fell into the dome.  After all of the panels had been cut out, I use the sanding cylinder to sand the edges of the holes straight and smooth out the panel adages too.  I also decided to score up the inner panels to allow for greater adhesion when I glue on the outer dome panels.  I had a little extra time and decided to go ahead and drill the holes for the logic surrounds and the holoprojectors.  Next week I will be doing the final gluing after installing the HPs and screwing in the radar eye.
Thunk!

Sunday, July 20, 2014

Legs fixed and finished

        As I wrote in an earlier post, I purchased and constructed wooden legs but an aluminum frame.  Normally this would have been a problem but the manufacturer of the frame makes a shoulder hub with 4 large bolts while the leg fabricator makes his with 6 holes with T nuts.  I did not notice this until I had finished putting the legs together and tried to attach them at the beginning.  I put the problem on the back burner until today.  
        There was a lot of thinking, testing, thinking again that went into this.  I did not want to make a mistake that I couldn't go back on.  The shoulder hubs on the COM8 frame are turned 36 degrees for a three legged driving droid or at 0 degrees for a static droid (one that stands there and looks pretty).  I assumed that someone that had metal legs would only have the 4 screw holes for the frame and that you would either screw them in with the legs straight up and down for a static droid or at that 36 degree mark for a three legged droid.  But the legs still only had the 4 holes right?  After a whole bunch of measuring and calculations, I figured that I could just drill two more holes in my legs in the 0 and 180 degree locations and I should be golden.
         I found some T nuts the size of the bolts for the frame on McMaster-Carr and decided to make my hole line up properly.  I used my Dremel to countersink the nut and some E6000 silicone and then JB Weld to hold the nuts in place.  I also used some twisted nails (I don't know what they are really called :) to hold them into the wood.  I am going to test these out soon and may decide to attempt to drill out the old nuts (they are a smaller diameter than the bolts) at the 90 and 270 degree locations and replace them with new T nuts for extra stability and hold.  Don't want the legs falling off of my droid.
Close up of the T nut and nail
Locations of the new nuts and old holes


       The rest of today I spent finishing the details on the legs.  Everything was painted, except for the booster hydraulics and under shoulder details, so I decided to put them together.  First I painted the pieces that were not ready so I could add them at the end of the gluing stage.  The horseshoes and shims went on with a bunch of E6000 clear silicone adhesive.  No problem clamping those and getting them lined up fairly well.  The shims or maybe the legs were not cut exactly right or maybe I sanded the legs a little too much, but no one is really going to notice except maybe another builder.  The buttons and horseshoe hydraulics were simple to glue in as well, I didn't even bother with clamping those as they sit there perfectly and are pretty light.
        The ankles were simple as well.  I hammered on the aluminum ankle plates first and then glued down the chunky ankle piece (the big white piece to the left of the long red one in the picture below).  Clamped that for 20 minutes.  Then I came back and glued on the cylinders first and then pushed the wedge into place too fit.  Finally, the cylinder holders were the last ankle piece to be placed.  
         The final piece to be put on the legs were the bane of this whole project so far.  These single pieces have given me the most trouble, the most repaints and detail paints, and repaints again.  And now they were about to almost give me a nervous breakdown as I glued them on.  I'm referring to the booster covers (the big red thing in the middle with the silver details).  First off, there are so many nooks and crannies on this piece that spray painting with equal coverage was very difficult and still didn't turn out the way I'd have liked.  Then I was having an issue with the iodized paint reacting with the chrome paint that I was supped to put on the detail portions (I ended up just hand painting with the silver metal cast base coat and it looks fine).  I also had to repaint these things twice because the red paint pooled in a couple of large key areas and looked like crap, very dissatisfied with these parts.
          Gluing them down proved to be just as much of a hassle.  There are no 90 degree angles on the top faces of this piece.  Finding the correct placement for the piece was easy because of its size, but finding a way to clamp it down was another matter.  Because the "legs" of the part are angle sloping from the inside (higher) to the outside (lower), when I put the clamps on it kept pushing the piece to one side or the other.  Then when I thought I had the same amount of pressure on both clamps I noticed that the "legs" were both being forced toward the center line.  Finally I decided to just clamp the head of the piece and forget the legs altogether.  It worked out and the part is hopefully permanently adhered to the leg.  
          But that was not the end of the drama.  The parts in the last picture, were to go in between the legs in the gap.  Simple enough, especially because the square head of that piece fits perfectly just below the head of the booster covers.  One small problem though, the base of the new piece is suppose to be placed just above the legs without touching them if the leg is laying down like you see in the pictures.  I tried to stand up the leg to allow for these new hydraulics to dry but there was a different problem there.  They are in two parts and one has a hole, which is deeper than it need to be, and the other has a stem to sit in there.  The part started slipping down into the hole.  When I laid the leg back down the part fell into the gap between the legs of the booster covers.  I came up with a MacGyver style fix using only a paper clip.  I bent the clip into a U shape with longer arms.  I cradled the part in the U while the arms rested on the red booster cover, keeping the part floating where it was supposed to be.  I left it there for two hours before removing the paper clip just for good measure and it worked beautifully. Woo hoo, the legs are finally done.
The almost finished legs

Chroming the booster hydraulics
Paperclip under hydraulic trip

Saturday, July 19, 2014

Mistake #232

         Today I decided that I wanted to clear coat the skins with a glossy finish so when people put their hands on him I can clean him off easier.  I unscrewed the skins and got out a bunch of the other smaller parts because I also wanted to sand down the backs of some of the resin pieces.  As you can tell my ADD kicks in with each new day of construction which, I guess, can come in handy when you have so many different directions you can go at any given time.
         I started with the rear skins and did one coat of crystal clear gloss.  Meanwhile, I also started sanding off the backs of some of the leg pieces.  When the resin is poured into the mold for these pieces the back is facing upwards because the back of a piece does not usually matter.  To put the piece in the body of the droid the back does not matter as it sits within the skin, but the pieces that go on the legs have to be seated flush up against the leg.  This means that any excess lateral needs to be sanded off.  It is an easy task if you have a belt or orbital sander, which I fortunately have.
         After sanding was done and the second coat of clear coat was applied to the rear skins, I started checking on how I was going to paint the octo ports and exhaust ports.  They both need to have some details in red and in chrome.  As I stated in an earlier post, the chrome paint and the iodized red do not mix and actually react with each other.  I cannot paint the piece in one of the colors and then paint over other parts with the remaining color.  It eats the paint up.  As I was checking about the colors to paint those ports, I discovered mistake #232 (not really, but it feels that way :)
         The skins, that I painted and glued together already, had a section that was supposed to be red not the white that I had already painted it.  The vent housing is supposed to be the color of the droid and I hadn't noticed that when I was painting everything.  While looking for pictures of the ports, I noticed that the vents area was blue for R2-D2.  A quick tape job around the rectangle and laying paper on the rest of the front skin and I was good to go.  Luckily, the clear coat can be applied when the base colors are still wet.  When the red was semi dry, I ripped off the paper and started applying the clear coat.
         Thats when mistake #233 occurred.  The paper that I had taped down on the skins had not covered one small area by the shoulder and when I applied the clear coat I saw little specks of red splattered there.  I quickly ran to get a paper towel and when I wiped it off some of the red came with the clear coat.  I sprayed more clear coat on it and wiped again to get the rest of the red.  I couldn't believe that it worked.  Then, I went back to applying the clear layer correctly and all was good.  Crisis averted.
         On a secondary note, I also applied a brown stone paint to my gaffi stick and it is looking great also.  More work tomorrow, maybe I will get the legs completed.

Busy Work Day

Gaffi stick primed and ready
 I love the days up in northern Michigan when we have nothing planned, especially when I have a project like our friend R2-M5.  I worked for 8 hours today.  I had a lot of little things to do today and one really big goal to tackle.  Starting with some of the little stuff, I multitasked and also did some prep work for the larger task as well.
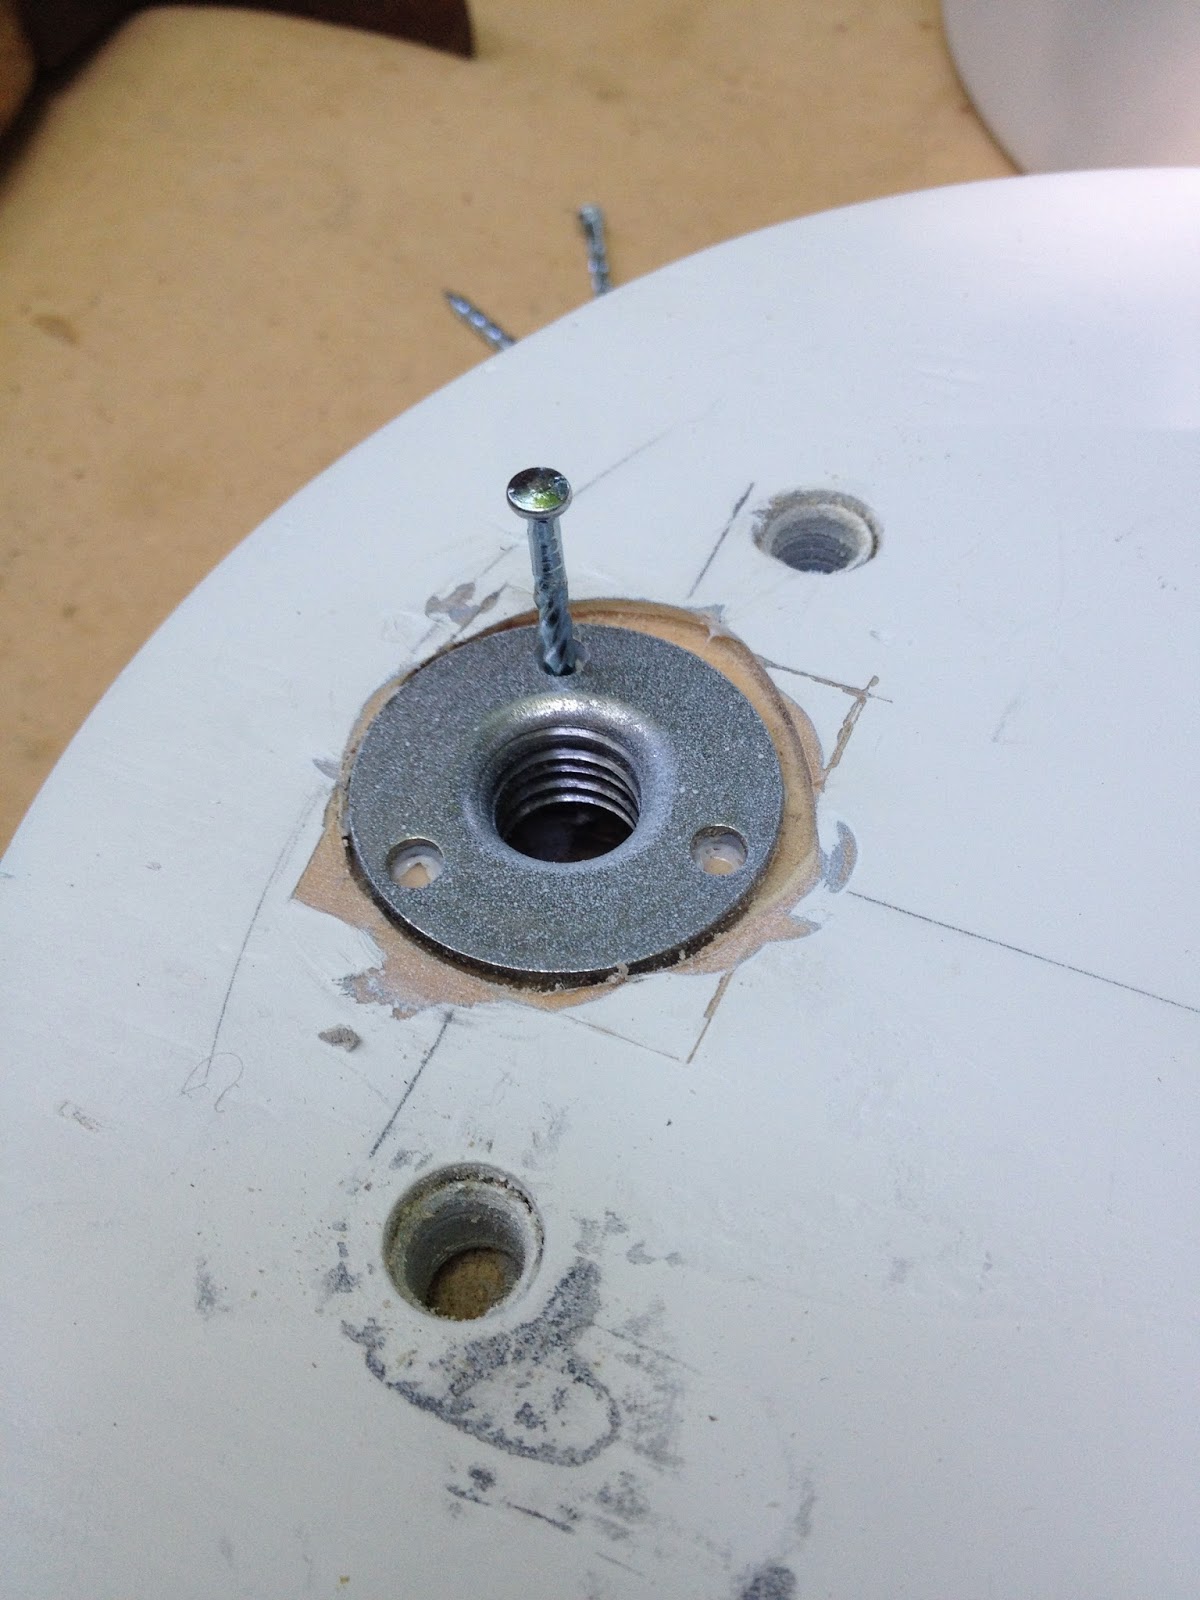
       My gaffi stick needed some attention so I primed it early in the hopes of getting a second coat on it before going to Traverse City tomorrow and getting some new spray paint.  I also had to correct some mistakes to my legs and horseshoes.  The other day I tried taping off and papering the horseshoes so I could chrome the inside rings to make them look like metal.  I did a pretty good job taping but then I thought, "I can just paint them upside down because I don't care about the bottoms."  Great ideas usually have some sort of consequence to me, in this case because I had paper on them (now on the bottom) the spray paint splattered under the paper and onto the white horseshoe in places.  That was one of the corrections that I had to make.  The second was just touch ups on the legs.  I had been touching the legs quite a bit while getting the four hole/six hole conundrum figured out.  In playing around with them and handling the bolts, I smeared dirty fingerprints on several places and couldn't get them completely washed off.  Repainting was the easiest and cleanest option.
Chrome painted inside

First painting of the day
          While waiting for those parts to dry, I started on my big job for the day getting the skins done.  I had cut out all of the pieces of the skins and filed down the burrs yesterday.  First thing to do was to wash the pieces and make sure any oxidation was cleaned off so the paint would adhere.
Washing the panel of the skins
         After the skins were sufficiently dry, self etching primer (wait 1 hour) was applied then two coats of white primer + paint 10 minutes apart.  Because I painted them in the most natural position, the paint ran a little bit and collected in certain areas.  I wait another hour and then sanded those areas to repaint and everything turned out ok.  I would stand up the skins if I had to do it again.
First coat needed to be sanded.
         While I was waiting for the paint to dry, I went over to the panels and glued them together.  There are thin rounded pieces that are part of the "outer" skin that adhere to the rectangle "inner" skin pieces to make the different panel doors on R2.  Once they have all been cut out and burrs removed, you have to reattach each door and frame.  I am using E6000 silicone adhesive for this.  It is easy to work with, adheres very strongly, and can be removed (with great effort) if it ever needs to be down the road.  But, make sure you use it outside, the fumes are crazy strong even a day after the piece has been cured.  The glue does need about 30 minutes to really adhere well before taking your clamps off, some pieces need a bit longer.
Clamping the frames to the panels
         Once the skins were dry and I had finished with the panels, I switched places.  The panels went over the the spray paint area in the woods and the skins came out to the deck with me for more gluing.  There was a debate online and with my wife about whether we should paint the inner and outer skins white, do them glued together or not, or whether to leave the inner skins aluminum and paint the outer skins separately.  The reasoning on the website was that canon for some of the screen R2s is all white, but guys say that an all white droid does not photograph well because a flash will white out all of the panels and there will no definition.  The next school of thought is that if you do paint both white, that is fine, but you probably need to weather the droid to get some dark colors into the nooks and crannies for great looking photos.  The final idea is to leave the inner skins aluminum, giving the panels a darker inside color, and paint the outer one white thus giving some definition.  Stephanie wants a clean droid, at least to start, so we opted for the aluminum inner skins and white outer.  When I did finish them and put them on the frame, they look great and they really do give some shadows for the pictures.
          Gluing the frame together was a slow process, but there were plenty of other little things to while waiting.  I had some touch-ups to make on a few of the leg details.  The iodized red spray paint has been a vexing product since the beginning.  I love the look of it but it has caused so many problems.  After the front skins were done, I taped in the panels for now not knowing which ones will be attached to hinges.  The back skins had a lot more to do because it is covered with panels and there is the rear door to attach as well.  When it is all completed I attached them to the frame*.
Lots of clamps

The trashcan and me

Looking like R2-M5, no longer a naked droid

See that definition
*for those reading for instructional purposes: I pre attached the inner skins to find the proper placement for the holes to drill.  There were mistakes made but it doesn't matter on the inner skins because they will be glued to the outer skins.  Once the outer skins were glued on, I drilled a hole from the inside through the hole I already tested on the inner skin.  This made it clean to screw the completed skins onto the frame.


Tuesday, July 15, 2014

There and Back Again

        This past week I found myself back in the Indianapolis area for a Boy Scout camp and I had three days by myself at home waiting for my daughter to get done with her Girl Scout horse camp.  I brought home with me the panel pieces for round two of painting.  I know, I know, they were already painted and ready to go right?  After seeing what the iodized metal cast red paint was supposed to look like on the resin pieces I compared them next to each other and the panels looked horrible.  They would have been totally outshone by the resin on the droid.  Not Cool!
        I had to purchase some more acetone after my last stripping party (not like that :)  The process took 5.5 hours to complete, annoyingly long process but I did get to watch two movies while doing it.  The dome panels were completely down to the metal again and washed.  The following day I watched the new Robocop movie (which was not half bad) in between running out to the garage to put a new coat of paint on.  They turned out awesome.  Exactly what I was hoping for the first time.  They just need two coats of the crystal clear sealant and they will be perfect.
You can't really see the metallic flecks in the paint job.
       Painting did not take the three days that I thought it would and it turned out that we were going to be at home for an extra day on top of that.  I still had a project that needed to get done before GenCon in August and that is my costume.  I decided to create my Gaffi stick, the club/spear of the Sandpeople. I took some 1.5 inch PVC tubing cut to 33", a 1 inch dowel rod, the spike off a cheap solar light, some styrene for the fins, and the "pineapple" that I bought with the rest of the costume.  It was fun putting it together too.  I got to use spray foam to fill in the PVC and use my Dremel to shape and draw some carving on it.  I had to make the end of the PVC curve at the end with the pineapple so I turned on our outside fire pit and heated up the end of the pipe.  I used a shepherd's crook to shape it a little bit and connected the pineapple.  After screwing together the ends and cutting slits for the styrene fins, I drew a simple design on the main body of the stick to carve out.  Now I just have to spray paint the body brown and the spike end silver and then wrap the hands hold with some twine and it will be done.  Here is a picture of the product so far.
Not a great picture, but I'll do a new one when it is done.
         …and Back Again.  To the Frozen North we went.  I finally got a chance to get some work done today, but no painting, it rained last night and was a bit cold all day.  I did install the utility arms into the frame.  I was also able to punch out the pieces in the skins so I can paint them as soon as the weather agrees with it.  I also figured out how to install the legs and tried them out.  I will post a complete account of the legs once I get some better pictures.  

My outdoor work space.


Thursday, July 3, 2014

Building in the North Woods

View of the lake
The Substitute DCB

       R2-M5 has made the journey to the cabin in Northern Michigan to be constructed.  The Toyota Sienna has become the DCB (Droid Construction Bay) for the month of July.  The weather up here has definitely been better for the spray painting portion of the resin parts than the humidity of Central Indiana.  The first thing I decided to do was to fix my past problem with the resin parts and get those cleaned and painted.  What? I didn't write about my problems with painting?
       If you know me, you know that I am not exactly a patient person when it comes to doing things that I want to do.  Getting ready for a Disney trip, going to a movie, giving a present, I am just not good at waiting for those things to happen.  Well, I really wanted to get the legs done and ready for DroidCon to show them off a bit.  It had been rainy and very humid and hot, if you don't know anything about spray paint which I did not, these were not good conditions for painting.  The paint came out too wet and was globby.  Some of the paint came out ok one day but then the second color on some of the pieces was bad.  I had to give up on it on day two of painting.
New metallic red with the stripped primer.
My wilderness set up.
       After DroidCon, I had a week before we left for the cabin and I really wanted to get these cleaned before leaving.  After some research I decided that acetone would be ok and eat the resin.  I was correct.  The paint came off but it was not easy and it took me four days using a toothbrush to get into all of the detailed areas.  That mistake will not be done again.
Shiny new dome bumps.
       Painting became a lot easier when we arrived in Michigan.  I was patient and waited a day between taping and second colors.  the product has been stupendous.  I am loving the red color that is coming out even with a couple missteps and redos.  The parts are looking great and I am trying to get R2 cosmetically completed by July 26 so I can take him to the Makers Faire in Detroit at the Ford Museum. Apparently Astromech makers are treated like royalty and I really want to have a Con under my belt before GenCon in August.  Things are looking good for completion and hopefully for driving him around as well.
        I have made a lot of headway in the past three days of work, even with a travel day to the beach and nearby sites.  I have gotten the center leg primed and painted (still tacky wet right now, picture next time), most of the ankle cylinders, the booster covers (which have been giving me many problems), dome bumps, and just this evening all of the other leg ornamental pieces are done.  Tomorrow is the 4th of July and there will be no time for work, and then Saturday I travel back to Indy to take my daughter to Girl Scout camp for the week.  I will not get anymore work completed until the following weekend, but I feel comfortable with the amount that I have gotten done this week.  I hope to get the small things that I still need at Lowe's while at home before coming back up for more work time.  This project is getting really fun right now because I am finally putting it together.  Good times!